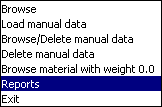
From the EPLANT-Piping Data Base Module two types of Material Reports can be generated:



Although the Material Reports are automatically generated, minimal controls must be done to insure that the Material Take Off includes all the required material, taking into account that the material processed by the data base module comes from:
The recommended sequence before generating any material report is the following:
Let's see in detail each one of these steps.
When a project is open, the Data Base tables that contain information about the project 3D Models (Piping Components, Lines, Equipments, Nozzles) are automatically synchronized with the 3D Material Reports executed in each of the models themselves. See details in Material Status Report. At the end of this operation, the following window opens with information about this process:

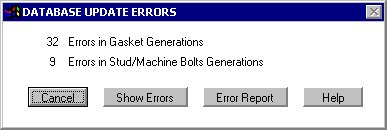
In case any error is found in this process, this window will show a summary of them:
Selecting the Show Errors button a new window will show each detected error along with the number of repetions of each error, because, in general, the same cause may generate several identical errors. With a double click of the mouse on the More Details column a help window will show a detailed comment about this particular error and the way to solve it:
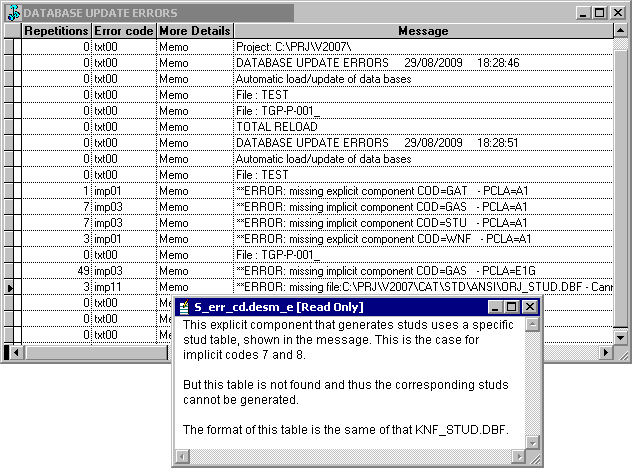
The errors that can be generated in this process are of two main types: errors in the
generation of implicit components (Gaskets, Studs, Weldings) and missing weight value for
a given component. Having found errors at this level, it is advisable to create a Report
using the Error Report button to save them for study.
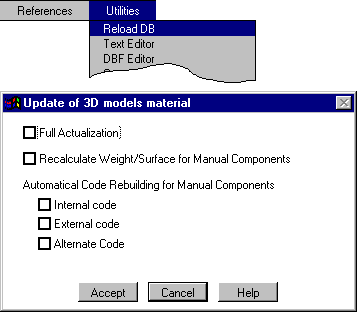
After fixing the causes that generate them, select the
Reload DB option in the Utilities menu, checking the
first option Full Actualization. In this way the material will be imported again and
without any errors.
The material of each 3D model is send to the data base module with the PD_1 / 3D Model Material Report command, executed from the corresponding drawing file.
There are two mayor vantage points in not having a direct connection between drawing files and the data base module:
With respect to this last point, from the data base module, after opening our project, select the option:

the Browse option opens the following window:

The leftmost field contains all the files with DWG extension that are currently in the project directory, with their last updated date and time. The Report Status field shows the Status of the MTO Report to DB done in the graphic module. Four cases are possible:
Any time that a project is opened, all 3D models and all report files are checked. If a change is found with respect the last project opening, the modified reports are automatically used to update the data base of the project.
This update operation can also be forced for all graphic reports, for example to update a material code definition. Use the menu option:
When the situation has been consolidated it is advisable to print a report of the current MTO Report Status, which represents the project material situation.
The project material can be visualized with:
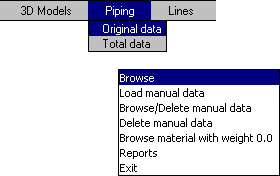
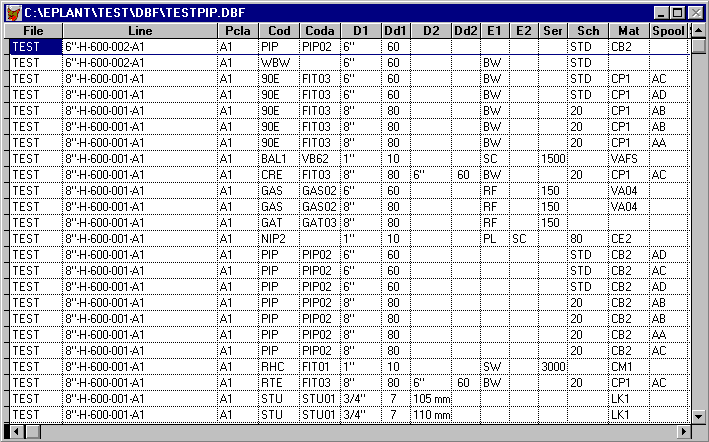
that opens a window when all project material can be inspect, one line for each material. 3D model, line name and all its characteristics are displayed:
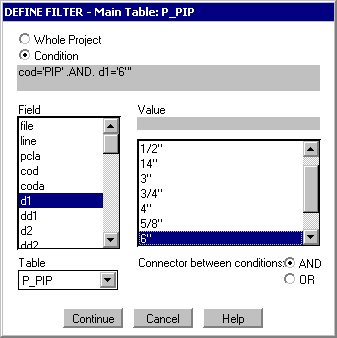
To find specific components a filter can be used. In our example we want to select all 6" pipe runs. The Component Code for pipes is PIP. First of all we have to select with a double click of the mouse the COD field in the FIELD menu, next we select with another double click the PIP code in the VALUE menu. The same with the pair D1 and 6":
 EPLANT-Piping Tutorial: Material Reports - Looking for 6" pipes (51sec)
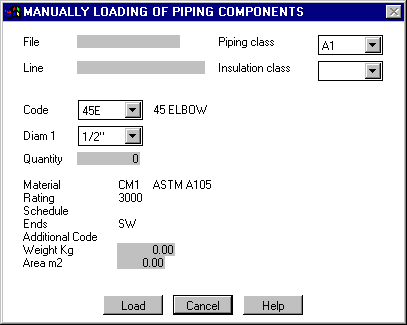
It is possible to directly load material into the data base module. This option can be used to generate the first revision of Material Requirements, using a manual estimation of project materials. Material loading is simplified using piping specifications:
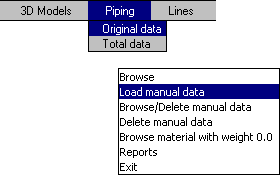
The following data entry window opens:
To browse through material manually loaded the following option is used:
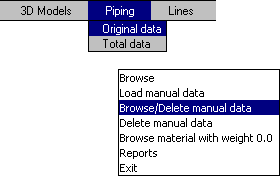
This Material may be deleted individually or by piping line.
At any moment, material reports of any kind may be generated. Select the option:
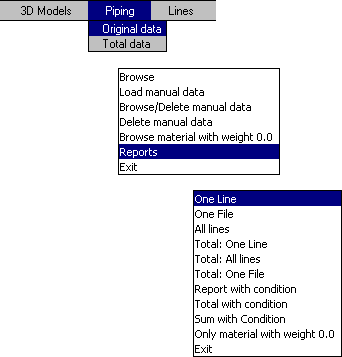
Report and Listing options shows all components, while Total options will total the quantity of the same materials. The three options with conditions allow to filter the material to report with any criteria.
The generation of Material Requisitions is basically to obtain the total quantity of each different material, grouping them according to predefined criteria and assigning to each material an Item number for easy identification in each group (requisition). In the Project Setup there are different options with respect to include all 3D models or not, the way the revisons are set, etc.
The working sequence is the following:
When we need to issue a new Material Requisition revision, we select the option:
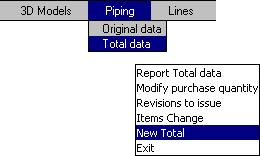
The Totaling is the process that generates the sum of the quantity corresponding to the same material, relative to the whole project, and includes the assignment of each material to a Requisition and to an unique Item number in that requisition. If this is the first time we make a New Total, the following window opens:
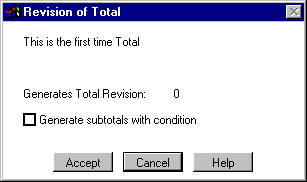
Selecting the Accept button, the Total revision zero will be generated. This number is not to be confused with the issuing revision assigned to each requisition. In our example, due to the project setup, requisitions are generated with revision A.
To verify how the material is grouped together in each requisition, let's browse all the items with the option:
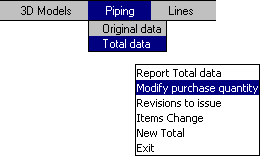
This option is used also to Modify the Purchase Quantity that is generated by default equal to the computed quantity, unless a surplus value is defined for that requisition. Each revision stores these two quantities. The following window opens:
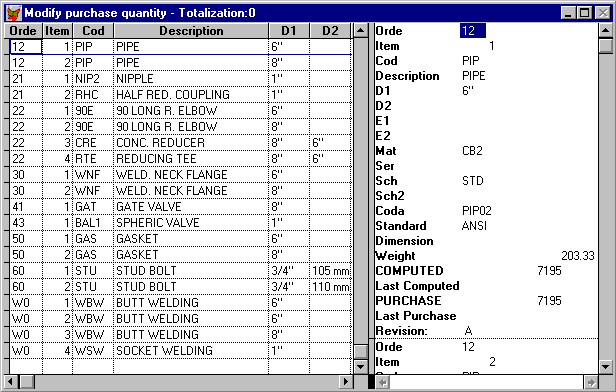
Let's analyze in detail the field ORDE, that contains the requisition codes. We can see that only one requisition have been generated for pipes, with the 12 code (corresponding to pipes having diameters > 2 1/2"). For Fittings we have the 21 and 22 codes (corresponding to diameter ranges of <= 2 1/2" and > 2 1/2" respectively.
 EPLANT-Piping Tutorial: Material Requisitions - New Totalization (41sec)
The assignment of the requisition code (ORDE field) in the Total table, shown in the previous point, can be modified with the option:
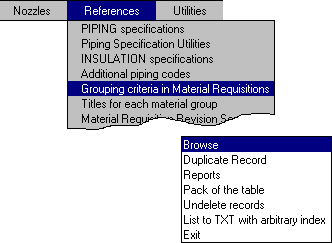
which opens the following window:
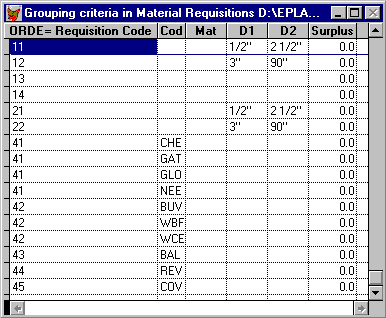
During the creation of the project, this table is loaded with this content which
corresponds to basic grouping criteria. When the value of a field (COD, MAT, DD1, DD2)
is not specified, any value of that field is accepted. If neither
COD nor
MAT are specified, the first character
of the ORDE Requisition Code is taken as the generic component classification ORD
code (it is the ORD field in the COD.DBF table). The D1 and D2 fields contain the
diameters used to specify a
diameter range.
For example, in the figure above, all Pipes (ORD = 1) with diameter between
1/2" and 2 1/2" are assigned the 11 code, for diameters greater than 2 1/2" to the 12 code.
The following rule applies also: if for a specific material no condition in this
table applies, the ORDE code is automatically assigned as the ORD code + the zero number.
For example, if a requisition with ORDE = 40 shows up, this material is a valve for sure
but of a type different for what specified with the 41, 42, 43, 44, 45 codes.
The procedure is thus to refine the conditions analyzing the codes that are generated,
modifying if necessary those conditions and redo a New Total up to obtain the required
grouping.
It is also possible to specify a surplus value to apply at the purchase quantity, for each condition. This surplus value takes priority over the global surplus assigned to the requisition as a whole, that can be assigned from:
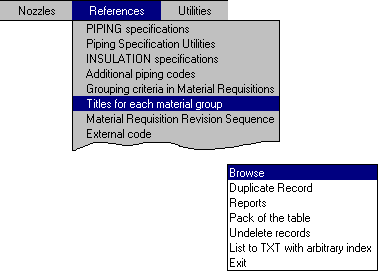
which opens the window:
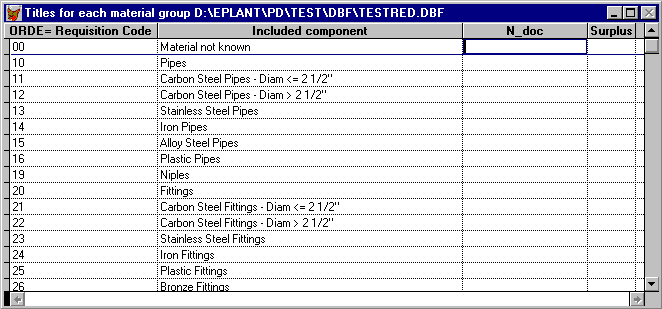
This table allows to assign also a Description and a Document Number (N_DOC field) to each requisition code ORDE. These fields can then be referenced in requisition reports, for example in the header. If the Surplus field is not void, the Purchase Quantity for all items of that requisition is computed increasing the Computed Quantity by the amount specified by this field, taken as %.
With respect to the revision assigned to Material Requisition, there are two different cases, depending on the project configuration:
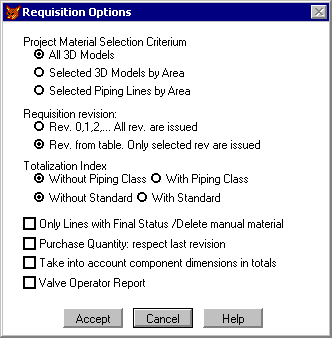
In our example we checked the second option, thus in the References menu the following option is enabled:
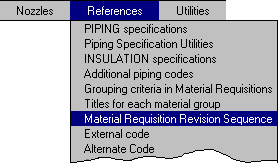
which allows to modify the default revision sequence as shown below:
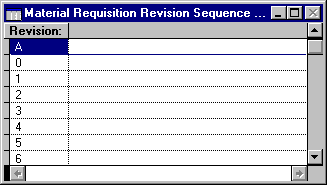
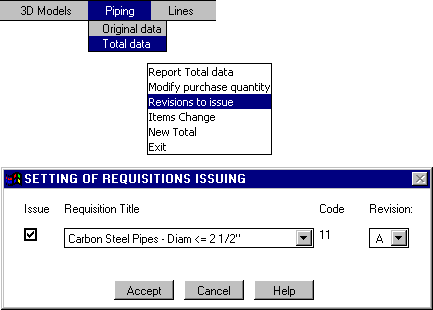
On the other hand, generating a New Total, all requisitions are set as issued, unless deselecting the issue button. It is also possible to modify the default revision, selecting another one. To take these options, select the following sequence:
 EPLANT-Piping Tutorial: Material Requisitions - Requisitions to Issue (34sec)
If after the first revision, due to project changes, another revision has to be issued, a New Total has to be generated before with the option:

Because there is now a previous total, the following window will open:
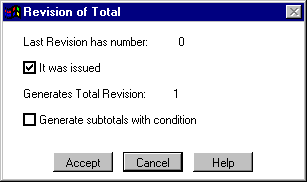
If the previous total has been really issued (although for only one requisition), this dialog box must be accepted as it is and the new total will be generated with the 1 revision. If the previous total was only used as a test and no requisitions were issued, the issued option must be unchecked to be able to regenerate the zero revision.
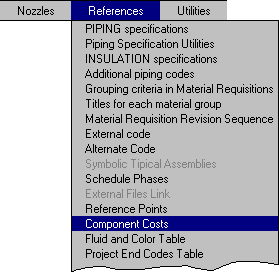
Each Piping Component can be associated with its cost. The corresponding table is opened from the option:
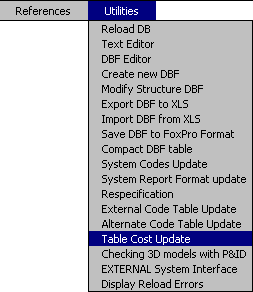
In the Table Cost each Piping Component is identified with the same parameters used in the Project Material table. The Table Cost can be imported from another project or automatically loaded including only the materials used in the current project using the following option in the Utilities menu:
which opens the following window tasks :
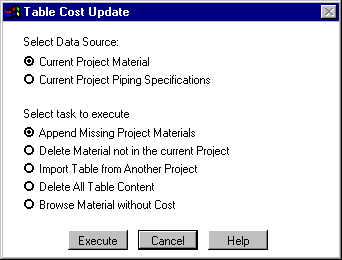
By means of the Table Cost, to each Material Report the corresponding cost can be associated.
To generate requisition reports the following option is used:
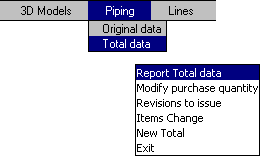
which presents several options. The most important is choosing among:

General material Summary is a report with a format useful to check requisitions, before issuing them, where both the Computed and the Purchase Quantity can be compared.
Material Procurements is similar to the previous one, but only has the Purchase Quantity and generates the document to be issued.
Procurements with Cost is similar to the Material Procurement one, but also with the Unitary Cost and Total Cost for each component.
All requisition Report options has the following options:

The Text File option allows to generate the report to a text file and modify its format. An internal report generator is used in this case and the following options are available: with the Generate button the report will be generated into a text file and with the Modify Format a new window will open to change the report format:
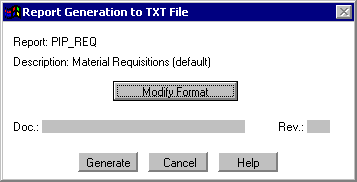
The Text File option is generally used when the report has to be exported to another program for further processing.
 EPLANT-Piping Tutorial: Material Report to Text File (52sec)
The XLS File option allows to generate the report to an Excel file and modify its format. An internal report generator is used in this case and the following options are available: with the Generate button the report will be generated into an XLS file format and with the Modify Format a new window will open to change the report format:
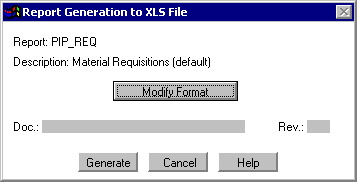
 EPLANT-Piping Tutorial: Material Report to XLS File (1min 5sec)
The External Code allows to assign an arbitrary material code to each piping component. To be able to use this option, it must be enabled in the Project Setup:
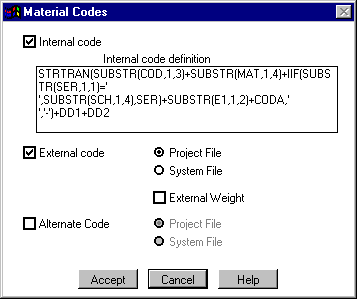
In this way the External Code option in the Reference menu is enabled also and allows to accede to the External Code table definition:
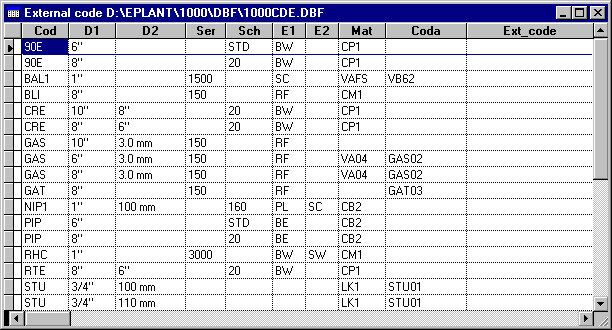
where in the columns to the left side the parameters used by EPLANT are displayed, along with the EXT_CODE column that is the place where to load the arbitrary code. The table structure can be changed to conform to the association rules.
There are two automatic ways to load this table, selecting the option:
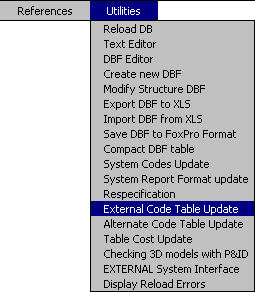
that opens the following window:
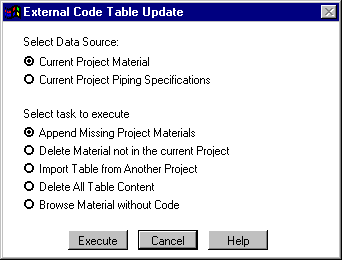
This command can be executed any time and again. The first option for Data Source, allows to update the table with the material currently in the project, loading the minimum possible data.
The External Code can be included in any material report, both in the data base and graphic module in isometric MTOs.
In case the material code does not change with the nominal diameter, this material code can be directly loaded in the CODA (Piping Additional Code, limitation: 16 characters) in the piping classes. If the material code changes with the diameter, the external code method is to be preferred.
Last updated May 04th, 2025.